

Control arms, otherwise knowns as suspension arm, arm assy, track control arm and trailing Arm, connect the wheel hub and steering knuckle to the vehicle’s frame or body. They allow the wheels to move up and down while maintaining the proper wheel alignment and keeping your vehicle stable. They pivot on each end – the mounts on the chassis side have a bushing that connects it, while the wheel side joins to the suspension with a ball joint.
Sturdy and long-lasting are characteristics of a control arm, but wear and tear or damage can occur after certain period. Sometimes control arm bushings or a ball joint can be replaced, but a complete control arm replacement is often simpler and still cost-effective. Whether you need an upper or lower control arm, most options range between $50 and $300 with $150 being the average.
Here, we’ll help you figure out if you have a bad control arm, how to replace it, and finally, how to confirm that the new part is good.
Symptoms of a bad control arm
- Bad control arm may exhibit uneven tire wear, as the misalignment caused by the failing component can put extra strain on the tires. If left unchecked, a bad control arm can lead to more serious issues with the suspension system, affecting the handling and safety of the vehicle.
- Identifying a bad control arm helps you address any issues and prevent further damage. Here are some common signs that indicate a failing control arm:
Unusual noises – Clunking, creaking, or popping sounds coming from the suspension when going over bumps, turning, or braking may indicate worn or damaged control arm bushings or ball joints.
Uneven tire wear – A bad control arm can cause poor wheel alignment, leading to uneven or accelerated tire wear, particularly on the inner or outer edges of the tires.
Vibrations – If you feel vibrations in the steering wheel especially at higher speeds, it could be due to play that allows side-to-side motion at the wheel.
Poor handling – A bad control arm can result in imprecise steering, excessive body roll during cornering, or a general feeling of instability while driving.
Visible damage or wear – Inspect the control arm for visible signs of damage, such as cracks, bends, or corrosion. Check the bushings for excessive wear, cracking, or separation from the control arm. Look for worn or damaged ball joints, which may have torn rubber boots or visible rust.
Excessive play – With the vehicle safely lifted and supported, grasp the wheel at the top and bottom and attempt to rock it back and forth. Excessive play could indicate a worn ball joint or bushing in the control arm.
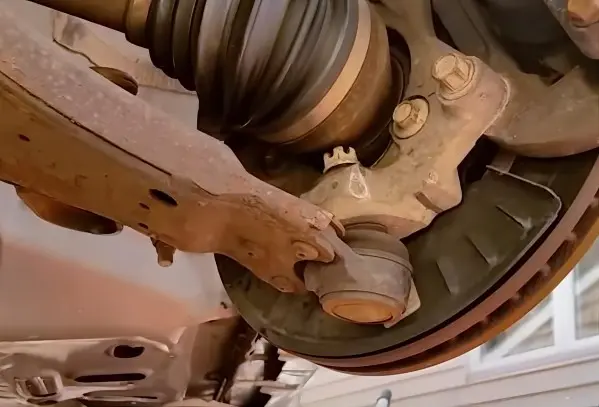
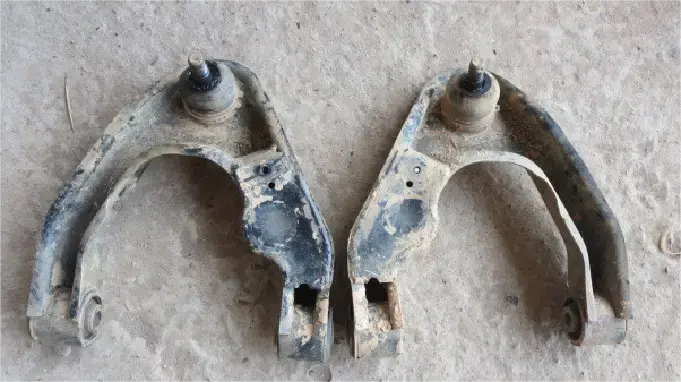

It’s important to address any of these symptoms promptly, as driving with a damaged control arm can lead to unsafe driving conditions and potential accidents. If you suspect an issue with your control arms, it’s best to have a professional mechanic inspect and replace them as needed.
Steps of how to replace a control arm
Here are general steps to guide you through the process:
1.Gather necessary tools and equipment – You’ll need a jack and jack stands, lug wrench, socket and ratchet set, torque wrench, ball joint separator tool, and possibly a pickle fork or hammer.
2. Lift and support the vehicle – Use a jack to lift the vehicle off the ground and support it securely with jack stands.
3. Remove the wheel – Use a lug wrench to loosen and remove the lug nuts, then take off the wheel.
4. Disconnect the ball joint or bushing – Depending on the type of control arm, you’ll need to disconnect the ball joint or bushing from the steering knuckle. This may require using a ball joint separator tool or a hammer to separate the components.
5. Remove the control arm – Unbolt the control arm from the chassis or subframe using a socket and ratchet set. Carefully remove the control arm from the vehicle.
6. Install the new control arm – Position the new control arm in place and bolt it back to the chassis or subframe. Make sure to torque the bolts to the manufacturer’s specifications.
7. Reconnect the ball joint or bushing – Attach the ball joint or bushing to the steering knuckle and tighten the nut securely.
8. Reinstall the wheel – Put the wheel back on and tighten the lug nuts.
9. Lower the vehicle – Carefully lower the vehicle back to the ground using the jack.
It’s important to follow manufacturer guidelines and specifications when replacing a control arm to ensure proper installation and alignment. If you’re not comfortable performing this task yourself, it’s best to have a professional mechanic handle the job for you.
How to test the new control arm after replacement
After replacing the control arm, it’s important to test the new component to ensure that it has been installed correctly and is functioning properly. Here are some steps you can take to test the new control arm after replacement:
Visual inspection: to ensure that everything is properly secured and aligned.
Steering wheel alignment: The steering wheel should be centered and the vehicle should track straight without pulling to one side by driving the vehicle in a straight line on a flat road.
Handling and stability: The vehicle should feel stable and responsive, with no excessive body roll during turns or instability while braking.
Suspension noises: Listen for any unusual noises coming from the suspension while driving over bumps, turning, or braking.

Steering responsiveness: Test the steering responsiveness by making turns at different speeds and checking for any delays or unusual resistance in the steering wheel.
If you notice any issues or abnormalities during your test drive, it’s important to address them promptly to prevent further damage and ensure the safety and performance of your vehicle. If you’re unsure about the results of your test or if you suspect any problems with the new control arm, it’s best to consult with a professional mechanic for further inspection and diagnosis.

The Suspension Control Arm is the primary structural component of the assembly, offering support and stability to the wheel and chassis. It is crucial to regularly inspect its performance to ensure a safer and smoother drive.
Crossing related suspension bushing as below:


